KDE Partition Manager Auto-Mount Guide
![]()
This is pre-installed on KDE images.
Deprecation notice
19/02/2024 ~ If you are using the :testing branch, this procedure is no longer needed as by commit e25e48b. media-automount-generator will handle automounting in non-removable devices (BTRFS and ext4 supported only).
Partitions will be mounted under /run/media/media-automount/PARTITION_UUID.
You can place a custom named shortcut to the partition with:
sudo ln -s /run/media/media-automount/PARTITION_UUID /mnt/CUSTOM_NAME
Instructions
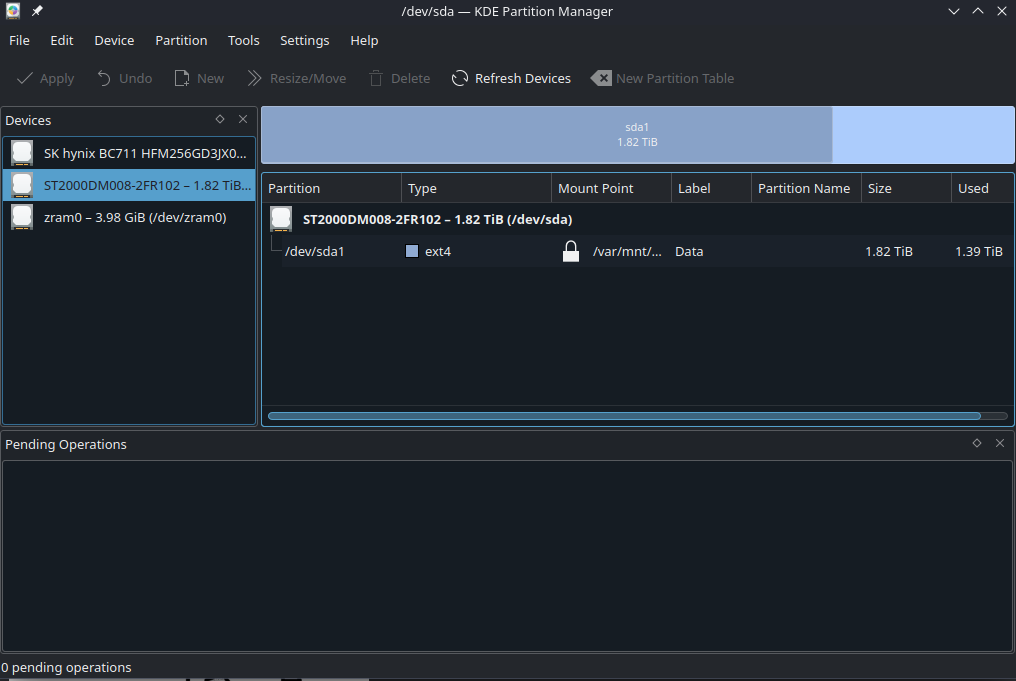
- Open KDE Partition Manager
- Locate the disk and partition you want to mount
- Right click on the partition and click "Edit Mount Point"
- Select "Identify by: UUID" (This will guarantee you mount THIS partition instead of a different one if the device nodes change for some reason)
- Select a mounting path (You would want to use
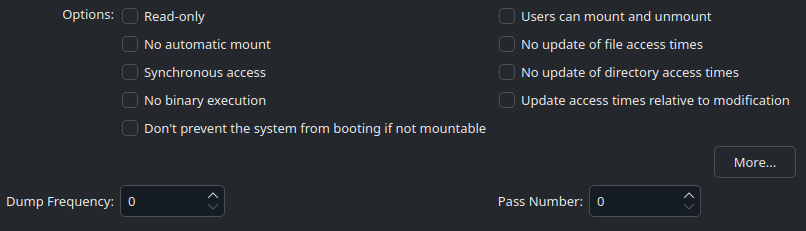
/var/mnt/gamesor something similar for permanent mounts) - Untick all the boxes in the graphical application if they are checked
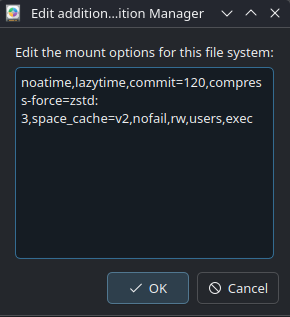
- Click "More..." and add extra options depending on what filesystem is on the partition (read the "Filesystem Arguments" section)
- Click OK on both windows to save the mount points.
- A message will appear that the actions will edit
/etc/fstab(Click "OK" to continue) - Mount the disk manually in KDE Partition Manager and enter your sudo password
-
Open the terminal to test the mounts by running the command:
sudo systemctl daemon-reload && sudo mount -a -
If no errors appeared then it should be safe to reboot.
If an error occurs, then research the error and undo what you did and try again.
Also a Display Name should be added to the drive too. Name it whatever you want it to be identified as.
Required additional options depending on filesystem
Use the below generic options depending on your filesystem (these are just good defaults)
You can copy+paste these into the "More.." dialog and they will be valid
Note
"Users can mount and unmount" is an optional setting.
Filesystem arguments
Warning
If a drive is formatted, then do not remove it from /etc/fstab, so the "nofail" option is a must to avoid issues with booting.
Example: btrfs requires these additional options.
BTRFS:
defaults,compress-force=zstd:3,noatime,lazytime,commit=120,space_cache=v2,nofail
Ext4:
defaults,noatime,errors=remount-ro,nofail,rw,users,exec
NTFS:
defaults,noatime,nofail,rw,users,exec
Note
Bazzite does not support NTFS. Using the NTFS filesystem will lead to a lot of issues and should be avoided.
Advanced Options (Not required for most setups)
Warning
Change at your own risk!
Information about compression:
3 is a good balance, older CPUs should use 1.
Information about subvolumes:
use subvol=name as an option, KDE and GNOME Disks let you only mount 1 subvolume through the GUI, you can mount the root with subvol=/ if a default subvolume is configured in the filesystem.
Installing KDE Partition Manager on non-KDE images
If you would like to install this, then it can be layered to your system by entering in a terminal:
rpm-ostree install kde-partitionmanager
Reboot your system after it has finished installing the terminal.